Apache HttpClient 学习日记
1 什么是Http
HTTP(HyperText Transfer Protocol)是超文本传输协议,用于在客户端(通常是浏览器)和服务器之间传输数据。它是Web上应用程序和服务的基础协议,主要用于请求和响应数据。
1.1 Http请求(Request)的组成
- 请求行(Request Line):包括请求方法、请求的资源路径和HTTP版本。例如:
GET /index.html HTTP/1.1
- 请求头(Request Headers):包含有关客户端环境的各种信息,如浏览器类型、语言、缓存控制等。例如:
User-Agent: Mozilla/5.0 Accept-Language: en-US
- 请求体(Request Body):在某些HTTP请求方法(如POST、PUT)中,包含向服务器发送的数据,通常是表单数据、JSON数据等。
1.2 Http响应(response)的组成
- 响应行(Response Line):包括HTTP版本、状态码和状态描述。例如:
HTTP/1.1 200 OK
- 响应头(Response Headers):包含关于响应的元数据,如服务器信息、内容类型、缓存控制等。例如:
Content-Type: text/html Server: Apache/2.4.41
- 响应体(Response Body):服务器返回的实际数据,通常是HTML、JSON、图片等内容。
2 发送Get请求
使用java发送Http请求有多种方式,比如Java标准库中的HttpURLConnection,使用第三方的Apache HttpClient、Okhttp和Spring的RestTemplate等。在本文,我们以Apache HttpClient为学习对象,进行尝试。
我们知道Http请求方法包含多种,在使用Apache HttpClient时我们可以通过创建不同的方式对象来时实现请求方法的选择。由于它们大同小异,本文只对 GET 和 post 进行讲解。
2.1 第一个Http请求
在maven中添加下面的坐标:
<dependency>
    <groupId>org.apache.httpcomponents</groupId>
    <artifactId>httpclient</artifactId>
    <version>4.5.14</version>
</dependency>
- 创建客户端
- 构造方法请求对象,类似的你可以构建HttpPost、HttpPut等
- 获取响应,并得到响应体的实体(HttpEntity对象)
- 解析HttpEntity,获取响应结果
- 由于CloseableHttpClient和CloseableHttpResponse都实现了AutoClose接口,因此无需finally块对资源进行释放
@Test
public void httpGetTest(){
    // 可关闭的httpclient客户端
    CloseableHttpClient closeableHttpClient = HttpClients.createDefault();
	// 定义请求地址
    String urlStr = "https://lazyking.site";
    // 构造HttpGet请求对象
    HttpGet httpGet = new HttpGet(urlStr);
    // 获取响应
    CloseableHttpResponse response = null;
    try {
        response = closeableHttpClient.execute(httpGet);
        // 获取响应结果
        HttpEntity entity = response.getEntity();
        // 使用HttpEntity工具类将entity转为字符串,并设置编码为utf-8
        System.Out.Println(EntityUtils.toString(entity, StandardCharsets.UTF_8));
        // 消费内容实体,确保流关闭
		EntityUtils.consume(entity);
    } catch (IOException e) {
        throw new RuntimeException(e);
    }
}
2.2 带参数的Http请求
我们并不能像上面的实例一样,直接使用String来定义URL地址,如:
String param = "httpClient&使用方式";
String urlStr = "https://www.baidu.com/s?wd=" + param;
这是由于URL 中有很多字符具有特殊意义,例如:
?用来分隔 URL 和查询参数&用来分隔不同的查询参数=用来分隔键和值
同时,HTTP协议本身不支持中文参数。如果你在 URL 参数中使用这些特殊字符或中文字符,可能会导致 URL 解析错误,或者服务器无法正确理解请求的内容。
可以使用 URLEncoder.encode() 方法用于对 URL 参数进行编码,将特殊字符转换为符合 URL 标准的格式(例如,将空格转换为 + 或 %20,将 & 转换为 %26)。这样可以避免字符冲突,确保 URL 可以正确传输。
String param = "httpClient&使用方式";
param = URLEncoder.encode(param, StandardCharsets.UTF_8);
String urlStr = "https://www.baidu.com/s?wd=" + param;
System.out.println(urlStr);
输出结果:
https://www.baidu.com/s?wd=httpClient%26%E4%BD%BF%E7%94%A8%E6%96%B9%E5%BC%8F
2.3 设置请求头
请求头中包含了诸多信息,承担了诸如内容协商、身份认证和安全、缓存控制等等的作用。
我们可以通过请求对象的addHeader()方法,去设置一次请求的请求头。
// 标识客户端类型
httpGet.addHeader("User-Agent", "Mozilla/5.0 (Windows NT 10.0; Win64; x64) AppleWebKit/537.36 (KHTML, like Gecko) Chrome/131.0.0.0 Safari/537.36");
// 标识请求来源页面
httpGet.addHeader("Referer", "https://lazyking.site");
2.4 请求配置
具体情况,具体分析,在访问某些网站的时候,可能会由于网络问题,导致访问时间超过默认的连接时间上限,导致连接失败。针对这个问题,我们可以手动设置连接时间上限。
RequestConfig config = RequestConfig.custom()
        .setConnectTimeout(500) // tcp连接建立的时间上限
        .setSocketTimeout(300) // 表示读取响应数据的时间上限
        .setConnectionRequestTimeout(5000) // 从连接池获取HttpClient的等待时间上限
        .build();
httpGet.setConfig(config);
2.5 设置代理
当进行网络数据采集时,目标网站通常会有访问频率限制等防护措施。如果单个IP地址的访问次数过多或频率过高,可能会触发网站的反爬虫机制,导致请求被限制或封禁。
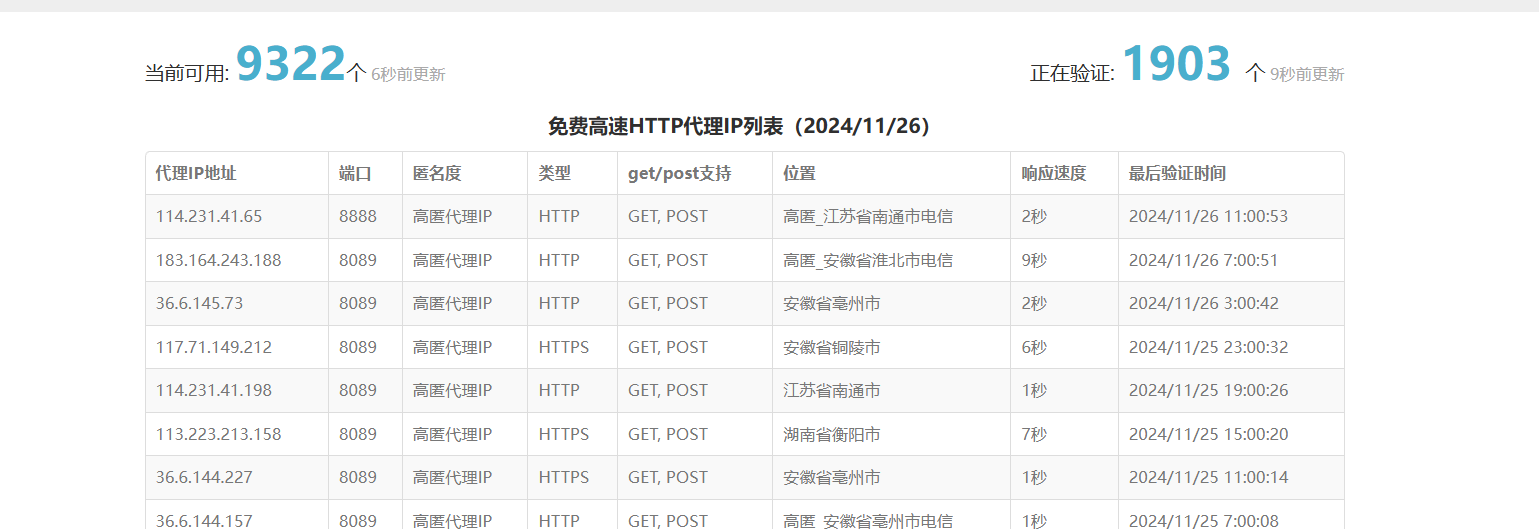
因此需要使用代理,想要稳定的使用,是需要消费的。本文仅作演示,=可以在百度上搜索免费代理,如:

// 创建一个代理
HttpHost proxy = new HttpHost("128.199.187.46", 9090);
// 将代理添加到配置中
RequestConfig config = RequestConfig.custom()
        .setProxy(proxy)
        .build();
httpGet.setConfig(config);
2.6 获取相应头
前面我们通过response.getEntity(),获取到了响应体中的内容。能否获取到响应头中的内容呢?答案肯定是可以的。
try {
    response = closeableHttpClient.execute(httpGet);
    // 获取响应码:
    StatusLine statusLine = response.getStatusLine();
    int code = statusLine.getStatusCode();
    System.out.println("code: " + code);
    // 获取响应头:
    Header[] headers = response.getAllHeaders();
    for (Header header : headers) {
        System.out.printf("%s: %s\n", header.getName(), header.getValue());
    }
    // 响应结果
    HttpEntity entity = response.getEntity();
    // 获取content-type
    System.out.println("HttpEntity " + entity.getContentType());
    // 读取结果 EntityUtils --> 对HttpEntity操作的工具类
    String responseBody = EntityUtils.toString(entity, StandardCharsets.UTF_8);
    System.out.println(responseBody);
    // 确保流关闭
    EntityUtils.consume(entity);
} catch (IOException e) {
    throw new RuntimeException(e);
}
Get请求实操 —— 从网络下载图片
@Test
public void getImageOnline(){
    CloseableHttpClient httpClient = HttpClients.createDefault();
    // 图片地址
    String imageUrlStr = "https://inews.gtimg.com/om_bt/Ob_3HYzSjq6EtisPNOltW3ilUKwldP7z5O6wSVwGUd4mwAA/641";
    HttpGet httpGet = new HttpGet(imageUrlStr);
    // 发送请求
    CloseableHttpResponse response = null;
    FileOutputStream fos = null;
    try {
        response = httpClient.execute(httpGet);
        if (response.getStatusLine().getStatusCode() == HttpStatus.SC_OK){
	        // 响应成功,下载图片
            HttpEntity entity = response.getEntity();
            // 获取图片的类型 image/jpg image/png image/gif
            String contentType = entity.getContentType().getValue();
            String suffix = ".jpg";
            // 根据ContentType获取图片的类型,这里写成Switch是更好的选择
            if (contentType.contains("jpg") || contentType.contains("jpeg")){
                suffix = ".jpg";
            } else if (contentType.contains("png")){
                suffix = ".png";
            }
			//
            byte[] bytes = EntityUtils.toByteArray(entity);
            String path = "F:\\Download\\image1" + suffix;
            fos = new FileOutputStream(path);
            fos.write(bytes);
        }
    } catch (IOException e) {
        throw new RuntimeException(e);
    }
}
3 发送post请求
如果我们只是发送不带参数的post请求,他的用法和发送get请求如出一辙,设置也可以在url中携带参数。我们要做的只是将HttpGet httGet = new HttpGet(urlStr)替换成HttpPost httpPost = new HttpPost(urlStr)。但是要发送携带参数的post请求会略有不同。不过,我们不妨先创建一个Springboot项目,作为等下测试请求的后端服务。
MyHttpPostController.java
@RestController
@RequestMapping("/")
public class HttpClientController {
	/** 处理携带x-www-form-urlencoded类型参数的请求 **/
    @PostMapping
    public Map formPostTest(HttpServletRequest request, @RequestParam Map<String, String> requestBody){
        Enumeration<String> headers = request.getHeaderNames();
        Iterator<String> iterator = headers.asIterator();
        while (iterator.hasNext()){
            String header = iterator.next();
            System.out.printf("%s: %s\n", header, request.getHeader(header));
        }
        return requestBody;
    }
	/** 处理携带json格式参数的请求**/
    @PostMapping("/json")
    public Map jsonPostTest(HttpServletRequest request, @RequestBody Map<String, String> requestBody){
        Enumeration<String> headers = request.getHeaderNames();
        Iterator<String> iterator = headers.asIterator();
        while (iterator.hasNext()){
            String header = iterator.next();
            System.out.printf("%s: %s\n", header, request.getHeader(header));
        }
        return requestBody;
    }
}
3.1 提交表单请求
我们在网页中填写的表格往往将参数以x-www-form-urlencoded格式传向后端,x-www-form-urlencoded 会将参数作为 URL 编码的键值对发送,类似于 URL 查询字符串的形式,但数据放在请求体中。
@Test
public void formPostTest(){
    CloseableHttpClient httpClient = HttpClients.createDefault();
    String urlStr = "http://localhost:8080/";
    HttpPost httpPost = new HttpPost(urlStr);

	// 创建表单数据
    List<NameValuePair> list = new ArrayList<>();
    list.add(new BasicNameValuePair("param1", "参数1"));
    list.add(new BasicNameValuePair("param2", "value2"));
    UrlEncodedFormEntity urlEncodedFormEntity = new UrlEncodedFormEntity(list, StandardCharsets.UTF_8);

    httpPost.setEntity(urlEncodedFormEntity);
    CloseableHttpResponse response = null;

    try {
        response = httpClient.execute(httpPost);
        ......
        }
    } catch (IOException e) {
        throw new RuntimeException(e);
    }
}
3.2 携带Json的Post请求
更多的,网页发送的post请求更多的还是携带Json格式的参数。
在创建Json数据的时候,我们会使用到FastJson,下面是它的maven坐标:
<dependency>
    <groupId>com.alibaba</groupId>
    <artifactId>fastjson</artifactId>
    <version>2.0.49</version>
</dependency>
@Test
public void jsonPostTest(){
    CloseableHttpClient httpClient = HttpClients.createDefault();
    String urlStr = "http://localhost:8080/json";
    HttpPost httpPost = new HttpPost(urlStr);

    JSONObject jsonObject = new JSONObject();
    jsonObject.put("param1", "参数1");
    jsonObject.put("param2", "value2");
    StringEntity jsonEntity = new StringEntity(jsonObject.toString(), StandardCharsets.UTF_8);
    jsonEntity.setContentType(new BasicHeader("Content-Type", "application/json"));
    httpPost.setEntity(jsonEntity);

    CloseableHttpResponse response = null;

    try {
        response = httpClient.execute(httpPost);
		......
    } catch (IOException e) {
        throw new RuntimeException(e);
    }
}
